The Document Foundation (TDF) uses Gerrit for the code review of LibreOffice. You can also clone the source code from there (and submit it). Thanks to the admin team of TDF the Gerrit instance is always up and running.
A commercial company created a fork of LibreOffice at April,1. It started it’s own Gerrit instance, but seemed to not employ a capable admin team for it’s infrastructure. Because of that you continous outage of the infrastructure of the company and Gerrit respctively nginx sends a error message 502 ‚Bad Gateway‘.
This makes it obvious that running a software project only with developers isn’t flying. There is much more needed for a succesful project, e.g. a capable infrastructure team.
And for a successful office software project you need among other things e.g. people working on localization and documentation, helping users and run the marketing of the software in as much as possible countries (speaking the regional language).
It’s really impressive how much effort a company, which contextalize itself in the FLOSS world, make to put stones in the way of other members of the FLOSS world. Instead of working for the public good and join efforts they spent ressources on renaming files etc. from the upstream project they forked the source code away.
And in addition to that every file get a new header with the pointer that they belong to the new project.
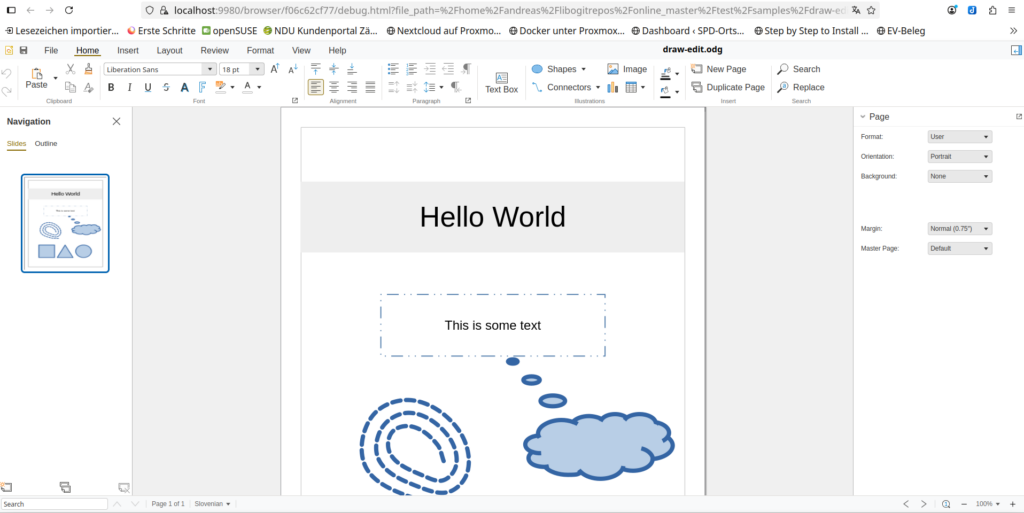
I already got some issues with my version of an Online version based on LibreOffice technology. The code it had some issues with the edit mode of Draw module in connection with LibreOffice core master, but not with the fork/branch of CO-25.04. This made me curious and I build two versions of CODE (the Collabora Online Development Edition). I build the first one against the fork/branch of CO-25.04. If I run this version with ‚make run‘ the example Draw document showed up as expected (see screenshot below).
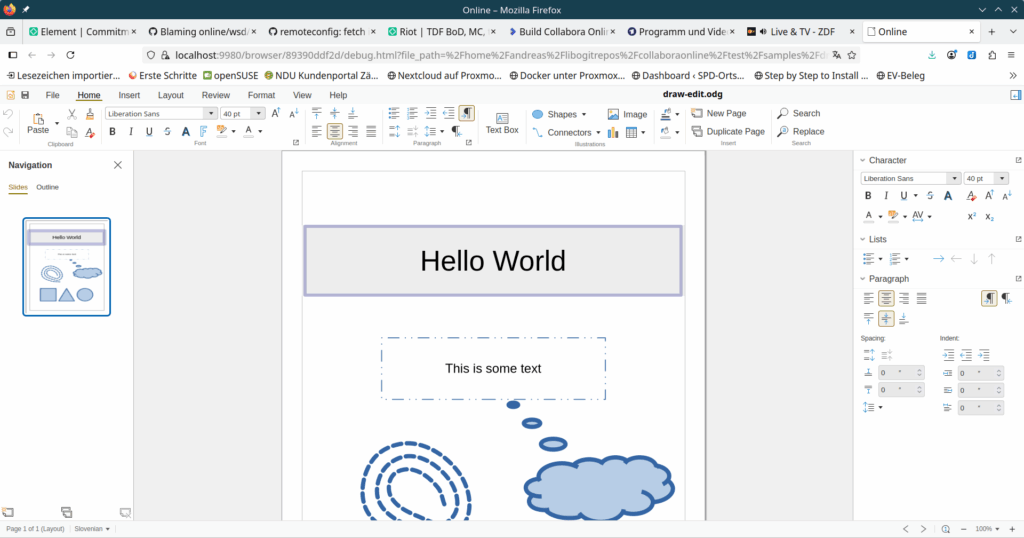
Then I tried, if the edit mode also worked. And this was the case (see screenshot below).
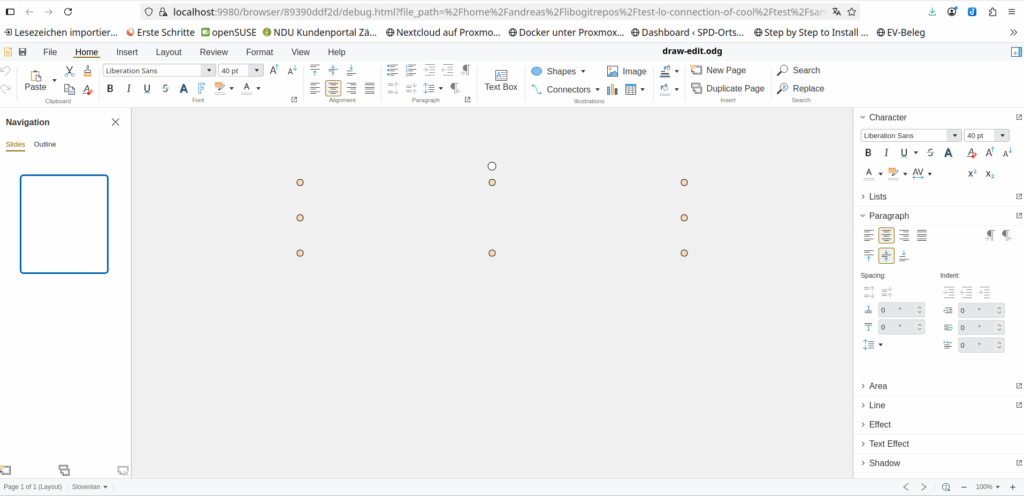
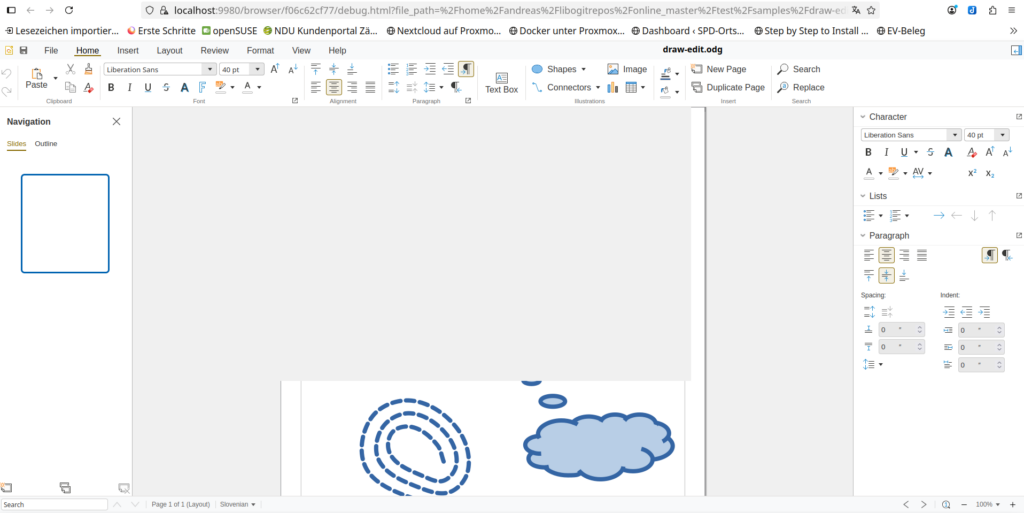
Because I’m curious, if CODE also works with the LibreOffice core master, the source code of the Open Source project, I build CODE also using the LibreOffice master. I did a ‚make run‘ and opened the Draw example document again. You could see what happened in the screenshot below.
The Online version didn’t show any content of the document yet. Because I clicked into the document (where the text box should be displayed) you see some boundary of a box.
This showed that CODE and the developer from the eco system company, which created this fork of LibreOffice Online didn’t use LibreOffice technology anymore, at least not fully. They created some changes in their Online version and in addition in their fork of the LibreOffice core and didn’t commit them back to the upstream project. This shows that they don’t really take care of the LibreOffice project and it’s community but only of their own commercial interests. They have no issue to use the resources of The Document Foundation and the LibreOffice community, but are reluctant about contributing back to the project and the community.
I think it’s not appropriate to use donation funded resources (like those from The Document Foundation and LibreOffice) and resources of a world wide community (e.g. the marketing, localization, documentation work etc.) to develop, test and build a product of a commercial company. It’s also not appropriate, if such company uses donation funded resouces of another Open Source project for their developer marketing.
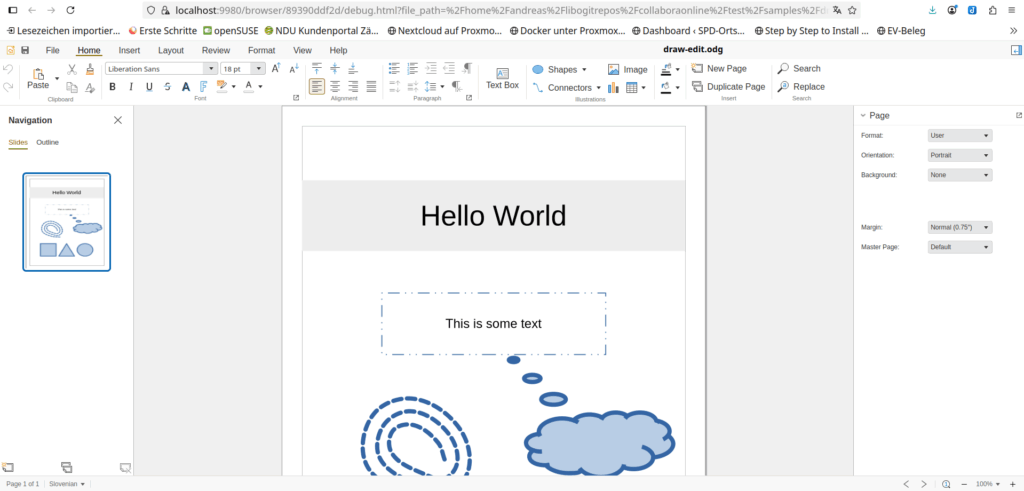
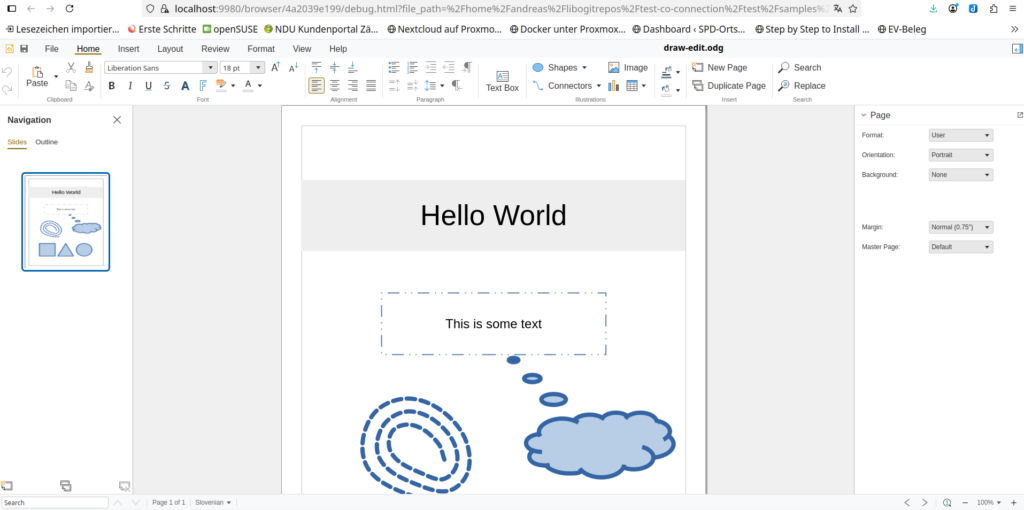
I got some issues with running the Draw Module of the LibreOffice Online / Free Online Office. I run my Free Online Office version (master) using the latest master version of the LibreOffice core (build on the same machine by myself). I can start Draw with an odg-document. This odg-document contains besides graphics also text boxes. Once I load the example document in online it shows the boxes with the text inside (see screenshot below).
But once I clicked into the text box to edit the text, the textbox disappeared and I got a big grey area instead (see screenshot below).
I first thought this might be an issue with the code of my Free Online Office code. But that wasn’t the case. I made an experiment. I run my online version using the LibreOffice core branch for Collabora 25.04 and opened the same example odg-document with it. The document loaded and I could view it’s content (see screenshot below).
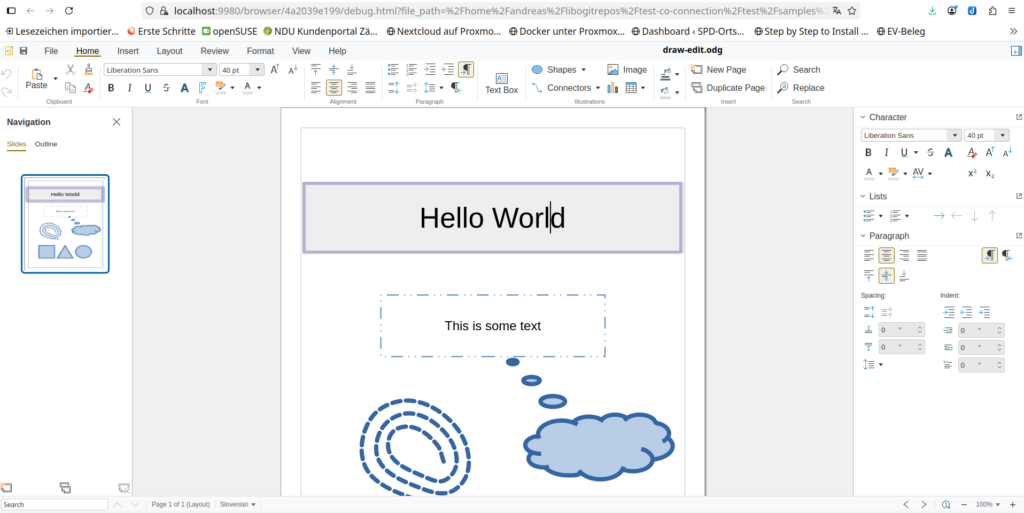
Then I clicked into the text box to edit the text and it happens that I could do this without any issues (see screenshot below).
Thus there is no issue in my Free Online Office but in the core module of LibreOffice. There are commits / patches inside the Collabora 25.04 branch of core which didn’t made it’s master. Thus you can’t create a fully working online office using the LibreOffice core master. You have to use its fork from the branch Collabora 25.04.
This shows that the eco system companies didn’t submit all their code changes to the upstream project, in this case the LibreOffice core master branch. This is contrary to their promise that they fully support the LibreOffice project. If that would be the case they would contribute / commit their patches to the LibreOffice core master first and then adapt them to their product releases.
They have no issue to use the resources of the LibreOffice project (funded by donations) for their development work, patch review, localization, marketing etc. but apart from that cook their own soup. It’s also disturbing that they use for their developer marketing the public resources of another Open Source project (Jitsi) (funded by donations) instead of running their own videoconference server.
This vulnerabilities stayed for months or more than a year or two nearly unchanged yet. That’s a desaster for an open source project, developed currently only by professional and payed developers.
There are fixes available for all this vulnerabilities within updated JS packages, but nobody seemed to care on fixing that.
I used this combined printer, scanner and fax machine with openSUSE for some years now. But it is always a lot of effort to get it working with a fresh Linux environment, e.g. after a hardware change. There are the packages and tools from Brother, which you could download from their website, but trat doesn’t make the complete and successful setup of the printer and scanner functionality. It is necessary that you install also some 32-bit packages:
zypper in -f glibc-32bit libusb-0_1-4-32bit libusb-1_0-0-32bit
The Javascript packages in the former git repository of LibreOffice Online and ist fork were not up to date. Thus I hat to work on update them. This and the code update took a bunch of my spare time.
I had also to work on the configuration of the shrinkwrap/shrinkpack tooling. The former configuration and especially the shrinkwrap.json.in file blocked the build process of the docker file. The naming of the shrinkpacked files changed.
Once this was fixed the browser part of LibreOffice was build sucessfully. And finally I was able to build a first lool docker container and start it.
I made a first test and could copy the loolwsd.xml from the container and also view the container log.
I worked further on the update of the LibreOffice Online source code during the last days. I brought it on par with its fork first. In parallel I worked on the JavaScript modules and were able to move them to newer versions. This fixes also some vulnerabilities, from critical to mid category. The npm tool doesn’t complain about vulnerabillities in the JavaScript area of the source code anymore yet.
I had a look at the ‚zoo‘ of JavaScript modules which are living in the browser part of LibreOffice Online and found a lot of outdated versions there. This modules need an update to newer versions. I’m working currently on this task step by step.
I also got the message in the shell about vulnarabilities in the modules, some of them classified high and one critical. I fixed a bunch of them with an npm command, thus there is no critical vulnarability left. The high classified dimished from 15 to five.
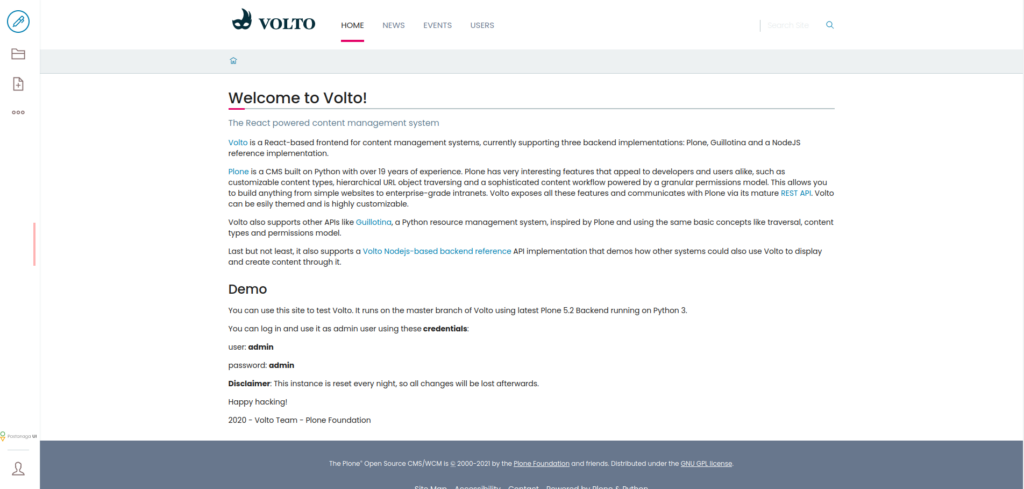
I installed the current alpha release of Plone 6 (a2) using buildout. I created a Python 3.9 virtual environment and used it to build a Plone 6.0a2 instance. I could start this instance in forground mode with ‚instance fg‘ and it was available at port 8080 on localhost.
This shows me a site where I could add a new Plone site to the instance. I used the advance button and could add the ‚plone.volto‘ add-on to it. This makes it more easy to use the new Volto frontend later (see screenshot below).
Once I finished the first steps with a new Plone 6.0-a2 buildout I made some further steps and added one of my Plone add-ons to the buildout script. I ran the buildout again and was able to include my add-on, named ‚collective.addons‘.
But once I started the instance in forground mode I got a traceback which points me to a line in the configure.zcml of the add-on. I had to comment out the line with ‚IncludeDependencies‘ in this file and everything went fine. I could install the add-on in the Plone site and also use its content types. It was able to view the content types within the Plone classic frontend. But there is currently no complete view of the content types within the new Volto frontend available. I’ll work on this during the next weeks.